Adding XSplit VCam 2.0 to Zoom, Microsoft Teams, Skype, and more
XSplit VCam 2.0 is the revolutionary, best in class AI-powered background removal and replacement tool but you already know that! You’re here because you want to know how to add it to various programs and honestly, it couldn’t be easier!
Zoom
Adding VCam into Zoom is as simple (as we’re going to find out with a lot of these) as adding any webcam!
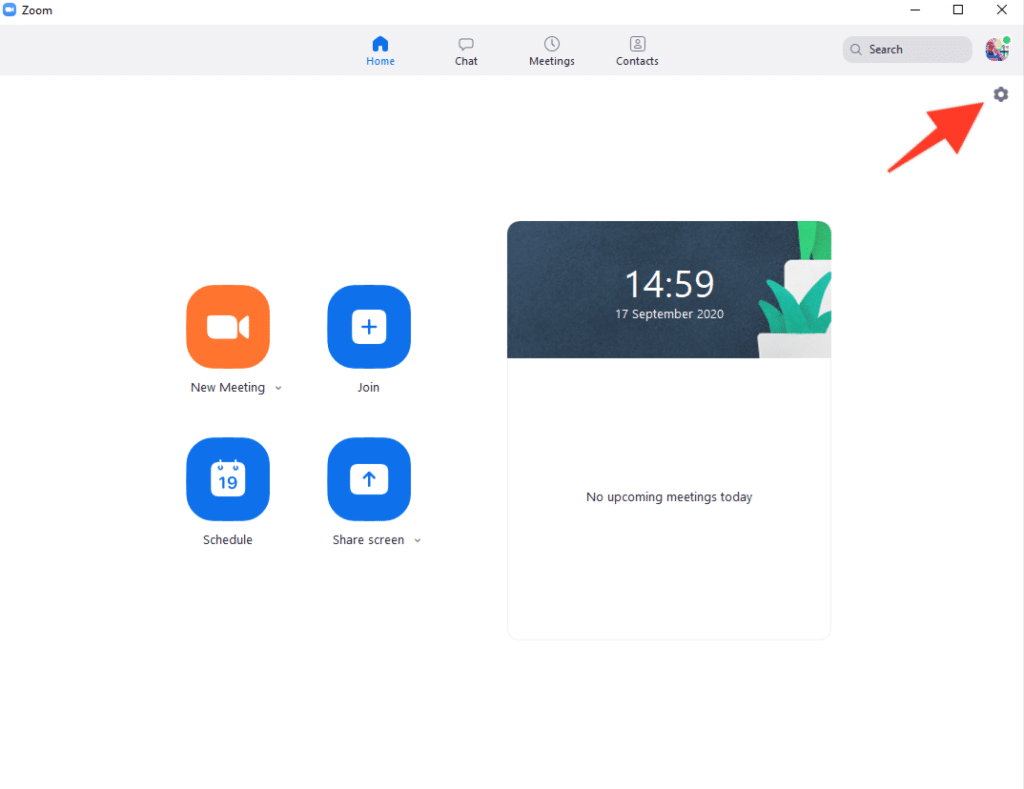
First up, once you have opened Zoom click the settings cog in the top right.
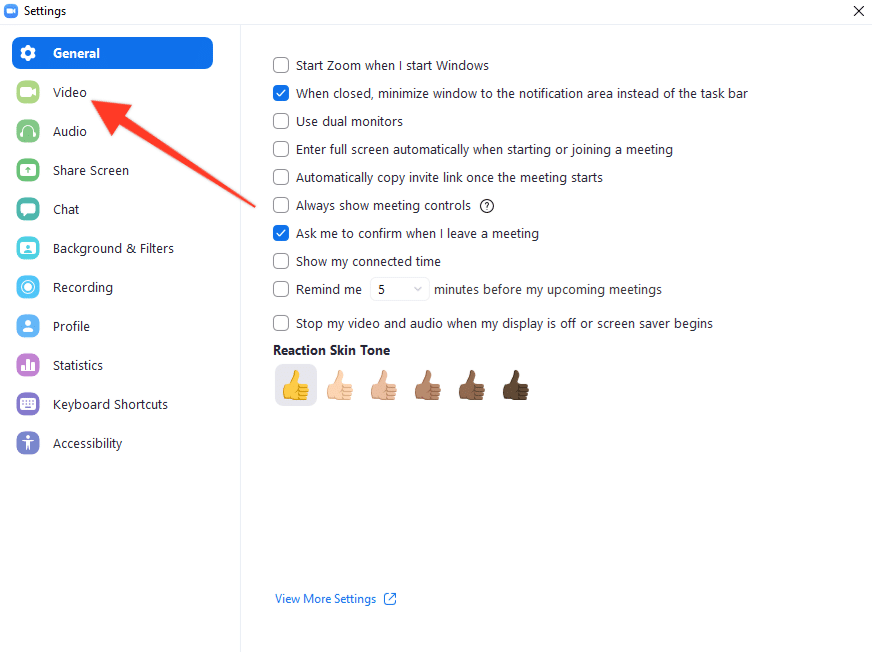
Next up, select Video.
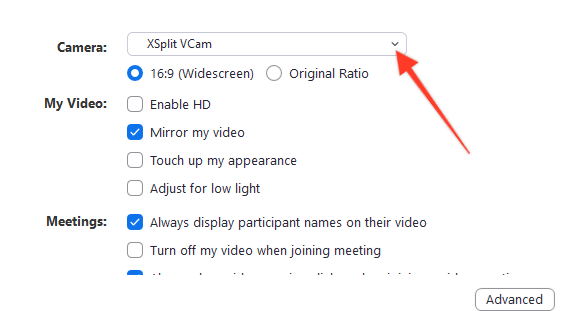
Finally, from the drop-down menu select XSplit VCam!
And there you have it, you can go into the VCam program and set up your video however you like and it will be reflected in Zoom!
Microsoft Teams
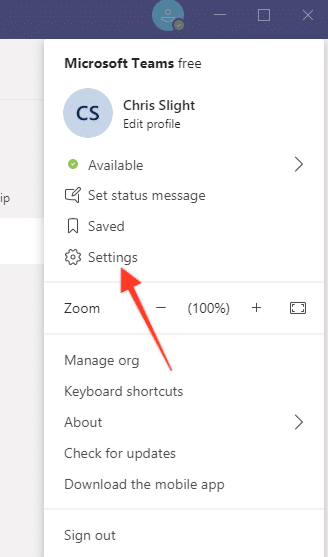
Once you have opened Microsoft Teams click on your profile picture in the top right.
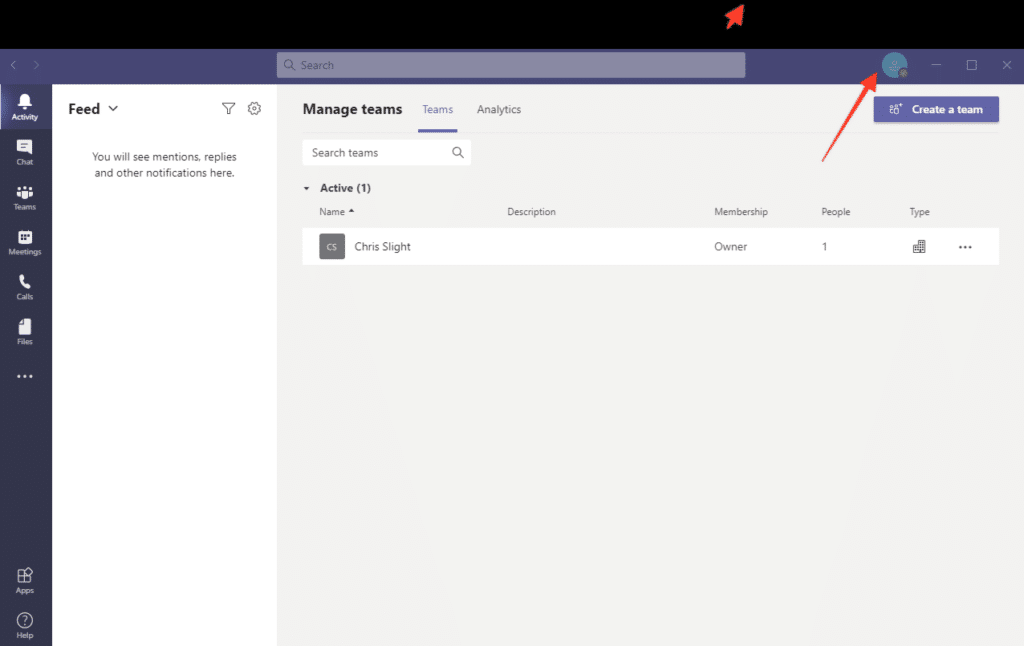
Next up, click the gear icon to enter the settings menu.
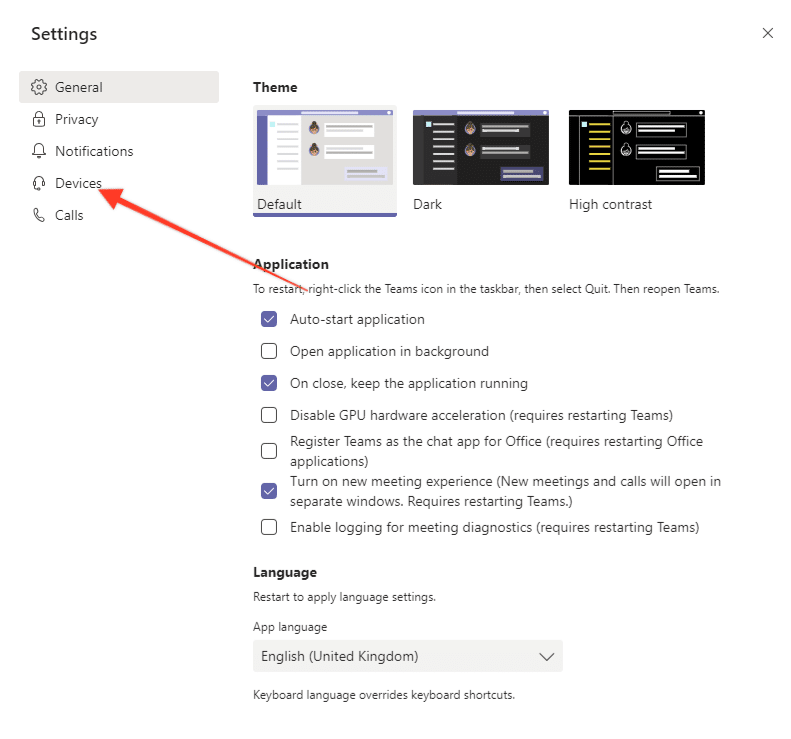
Once in the settings menu, select Devices
Finally select XSplit VCam from the drop-down, menu in the Camera section.
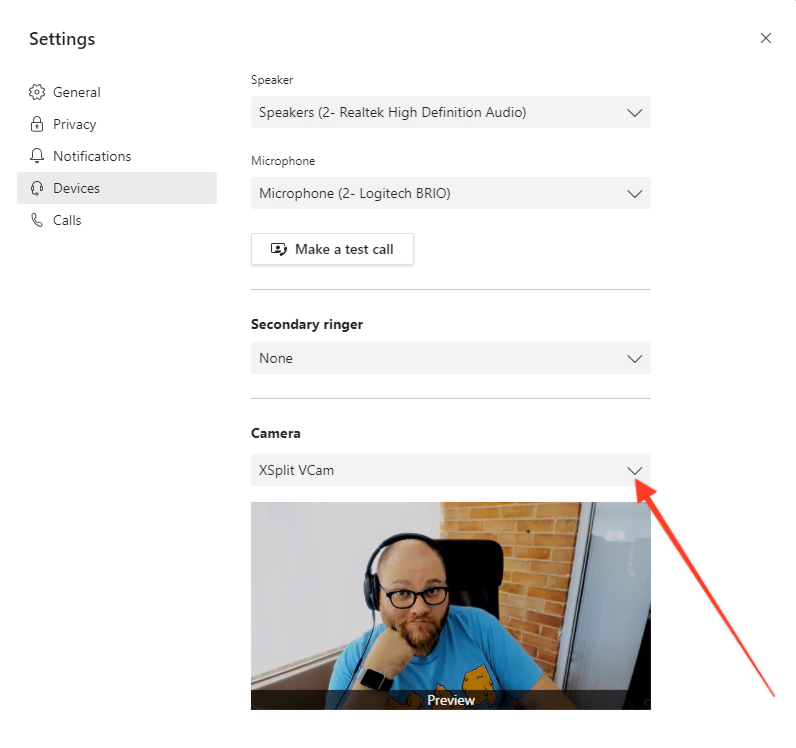
Now you’re all set up and ready to use XSplit VCam 2.0 in Microsoft Teams. Setting your camera to remove or replace the background is still done in the VCam app and you’ll see all the changes you make reflected immediately in Microsoft Teams!
Skype
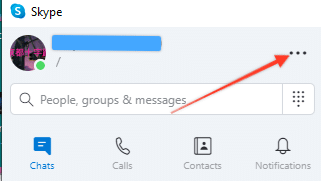
First up, after we open Skype you’re going to want to open the three-dot menu and click “settings”.
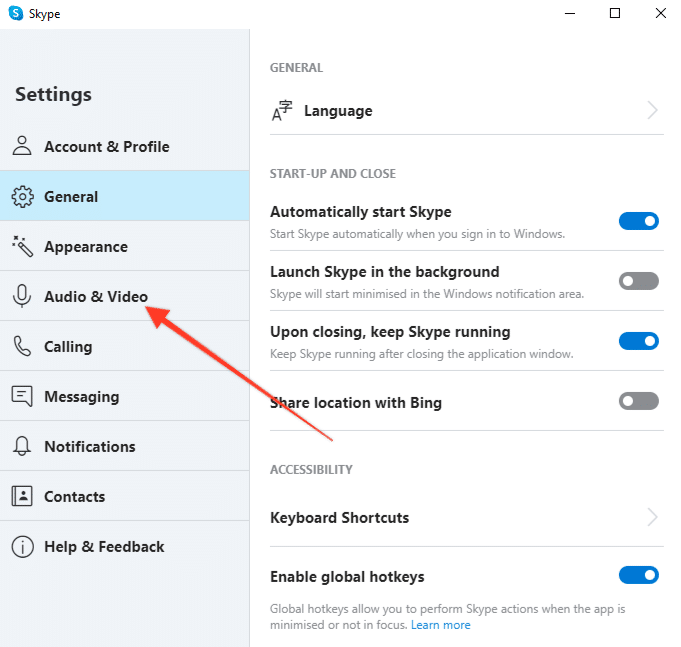
Then you’re going to want to click “Audio and Video”
Finally, select XSplit VCam from the drop-down menu and you’re ready to go!
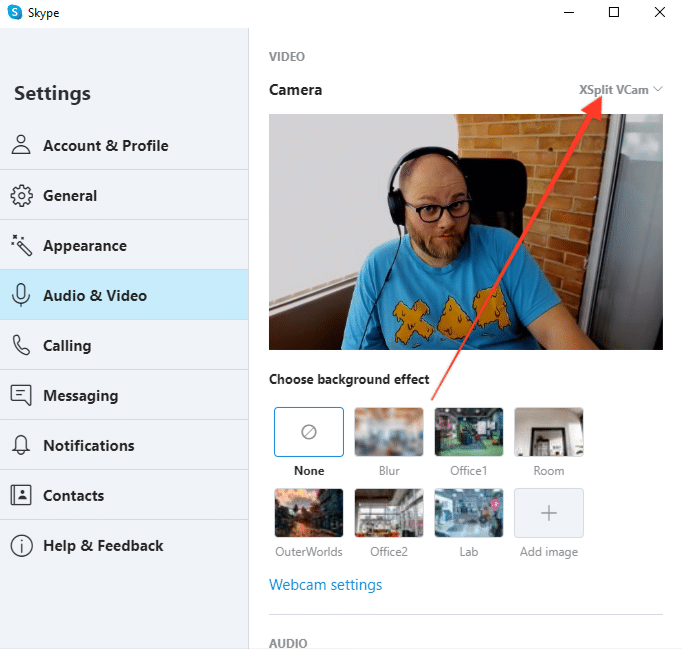
Getting everything set up how you’d like in the VCam app itself is the same and any changes you make are immediately reflected in Skype!
Now for the “anything else” part of the title! XSplit VCam 2.0 works as an embedded camera on Windows 10 so really, any program that can detect any use a webcam could use XSplit VCam 2.0. The process is similar for a lot of programs, find where you can add your webcam and select XSplit VCam and you’ll be ready to go!
